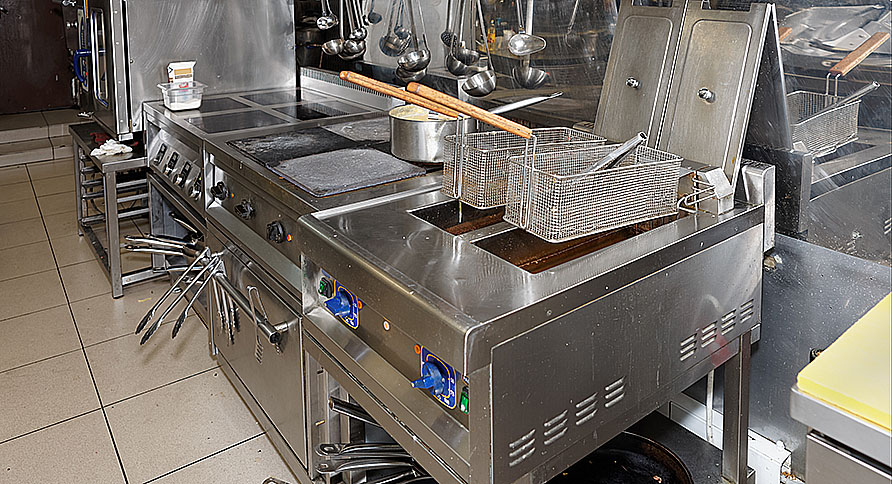
Cleaning a commercial deep fryer is important to keep the business running trouble-free. Deep fryers are designed to fry and serve fresh and hot meals to the customers. Since they work with the oil to prepare food products, it is essential to deep clean them regularly as part of basic maintenance and also look for problems to perform deep fryer repair as soon as you spot them. We are going to share step-by-step instructions that will help you keep your fryer looking brand new.
Grab Your Fryer Cleaning Tools
The first step of the process is grabbing your fryer cleaning tools. This includes the protective gear that will help you protect your hands and other body parts. Invest in a good quality pair of nitrile gloves and goggles that will prevent the eyes and hands from being exposed to the chemicals and other potentially dangerous agents.
Furthermore, wear a heavy vinyl apron as oil can cause grease stains and even burn the skin. Next, grab a scrubbing brush with a long handle that will allow you to easily access narrow areas. If possible, purchase a fryer coil brush as well, which makes cleaning tight spots even easier.
Remember, the commercial deep fryer should only be cleaned after fully shut down. If you have used it recently, make sure that it is not hot. You can easily risk injuring yourself. Therefore, allow it to cool down and proceed accordingly.
How To Clean A Fryer?
Now that you are done gathering the cleaning supplies, it is time to begin cleaning the fryer. Then again, use a thermometer to make sure that the fryer is not hot. Then, take out the baskets and other removal items. Carefully, drain the oil in a pan and use a metal spatula to clean the gunk on the sides of the fryer.
Use a paper towel or soft cloth to wipe the sides. Moving on, turn on hot water and place the baskets and other components in the sink. Using a dish soap or any other cleaning agent, scrub the items while adding ½ cup of white vinegar.
Once you are done scrubbing and washing the removed parts, proceed to clean the interior of the fryer using the same technique and cleaning agents. However, use water in a limited quantity. Make sure the water does not enter and damage the electrical components of the fryer.
After rinsing, use a lint-free cloth and wipe the heating element in a damp rag and then dry it.
Deep Fryer Boil-Out
When it comes to thoroughly cleaning the interior of your commercial deep fryer, experts use a technique that is called “boil-out”. It is an effective way of removing any grease or gunk that might influence the taste of the food products.
Therefore, to prevent the flavor from being affected, it is important that you give your fryer a boil-out. Plus, it also helps the oil last longer. As a result, you will be able to cut down the replacement costs.
How To Do A Deep Fryer Boil-Out?
The boil-out technique is simply a process that includes using a cleaning solution along with boiling water. This combination helps lift and remove stubborn grime and grease. Grab a fryer cleanout rod, cleaning solution, and a high-temperature fryer brush.
Begin by draining the grease from the deep fryer. Next, utilize a fryer cleaning rod for the drain line cleaning. Once you are done, use hot water to rinse and remove any leftovers. Then, use cool water to fill the fryer around 4” from the top. Read the instructions provided on the cleaning agent packing, prepare the solution and add it to the fryer.
Turn on the fryer and allow the solution to boil for around 20 minutes. Once the time is up, allow the solution to drain gently. Once the solution has drained, use a long brush to scrub the fryer insides. Finish by rinsing with hot water.
Final Word
A commercial deep fryer is one of the most expensive and important commercial kitchen appliances. Make sure that you clean it every three to six months and hire commercial appliance repair services for maintenance to keep it running at its optimum condition. topac